![]()
Product page order notes
In this tutorial we’re going to use Line Item Properties to collect customization informations on Shopify product pages.
Note: You can do this by installing an app from the Shopify App Store, but here we’re going to do it manually and directly in the theme code, let’s go!.
Start collecting customization informations for all your products
Note: If you want to collect informations for specific products, you would need to create a new product template first.
If you want this feature to be displayed on all your products, you can skip this section and start reading here. After you’ve pasted the generated code in the template file you’re done!
Create a new product template
- From your Shopify admin, go to Online Store > Themes.
- Find the theme you want to edit, and then click Actions > Edit code.
- In the Templates directory, click Add a new template.
- Choose product from the drop-down menu, and name the template custom
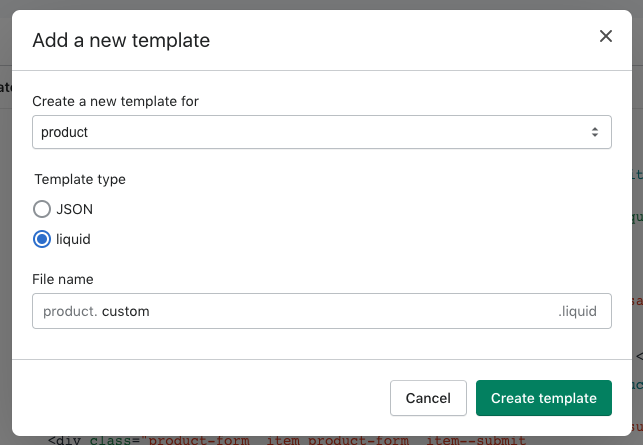
- Click Create template. This creates a copy of your
product.liquidtemplate calledproduct.custom.liquid. The new file will open in the code editor. - Find the following line of code:
{% section 'product-template' %}
And replace it with:
{% section 'product-custom-template' %}
- Click Save.
- In the Sections directory, click Add a new section.
- Name your new section file
product-customizable-template. Click Create section. Your new file will open in the code editor. - Delete all of the default code so that the file is empty. Copy all of the content from your
product-template.liquidfile (in the Sections directory), and paste it into your new product-customizable-template file. - Click Save.
Start using the Line Item Properties
You are not limited in the number of custom fields, you can add as many custom form fields to your product page as you want. Shopify has developed an amazing tool called Shopify UI Elements Generator – It helps generating the HTML and Liquid code for each form field that you want to add to your cart page. You can also easily add socials icons, cart attributes and payment method!
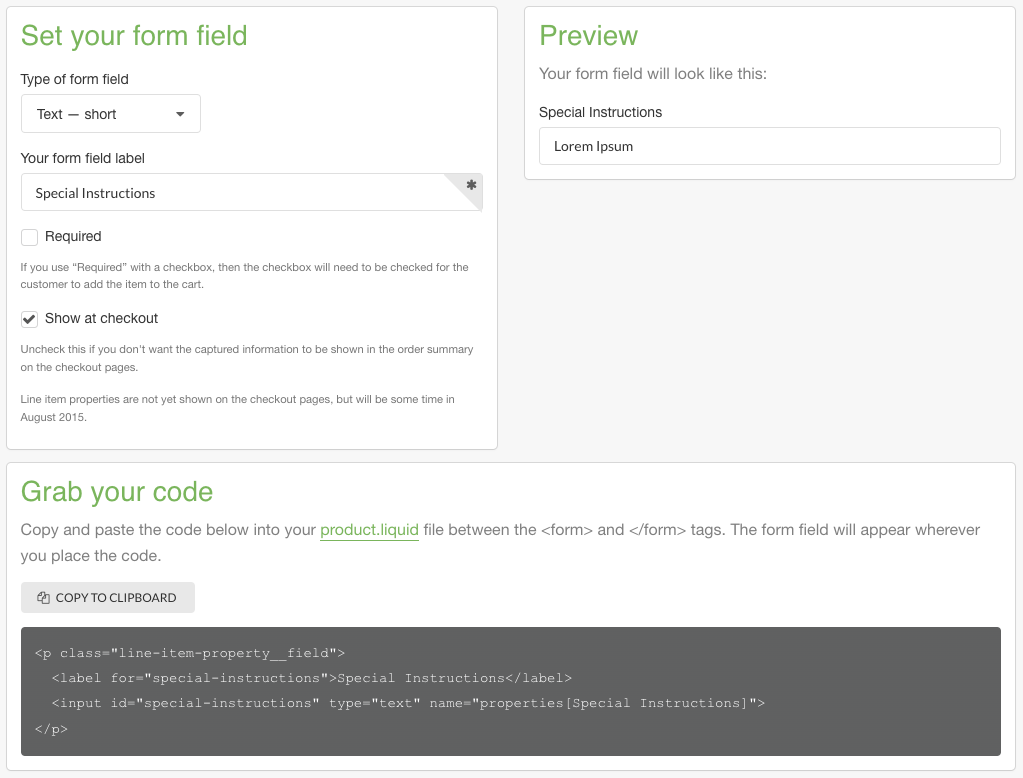
- Go to the Shopify UI Elements Generator.
- In the Set your form field section, select the type of form element that you want to use. In this tutorial we’re going to use the text — short version.
- Write your form field label
- Tick the box “select at checkout”.
- And copy the generated code
Add this code in the theme
- From your Shopify admin, go to Online Store > Themes.
- Find the theme you want to edit, and then click Actions > Edit code.
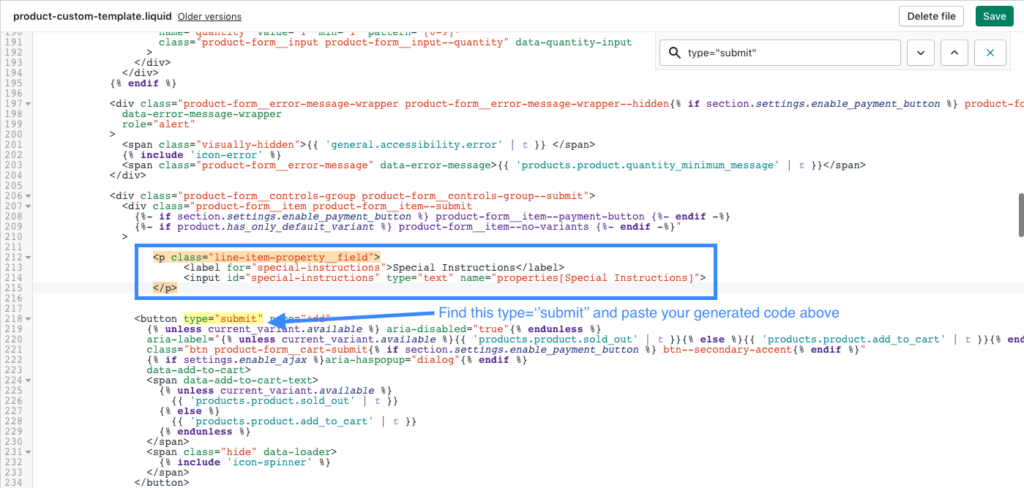
- In the Sections directory, click
product-custom-template.liquid. - Find the code
type="submit"in the file (using command F on your Mac keyboard or ctrl F on Windows). This is part of the code for the Add to cart button. On a new line above the block of code that contains the Add to cart button, paste the form fields for your product customization: - Then you can customize the label by changing the words between the <label> tags where it says here ”Special Instructions” and this situation we’ve added the text filed above the add to cart button but you can play around and paste it anywhere else you want.
- Then click Save.
Apply your new template to your specific product
Note: If you wanted this feature to show to all your products, congratulations you’ve made it sailor!
- From your Shopify admin, go to Products > All products.
- Choose the product that will use your new template.
- In the Theme templates section, choose
product.customfrom the Product template menu. - Click Save.
You can now use the Shopify’s bulk editor to enable your template on many products at once. Easy isn’t it?!
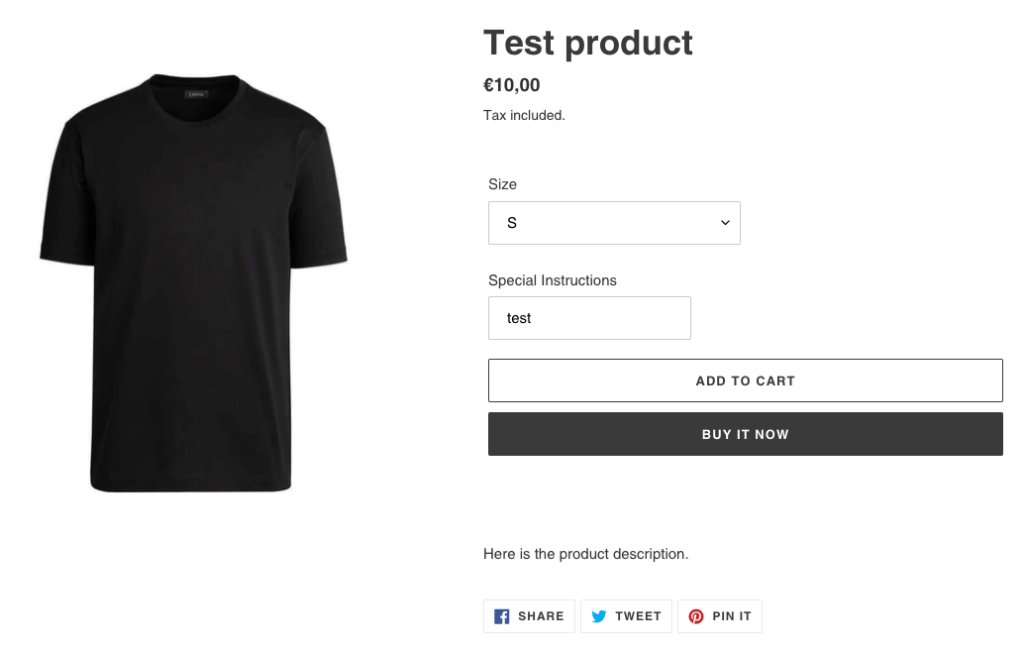
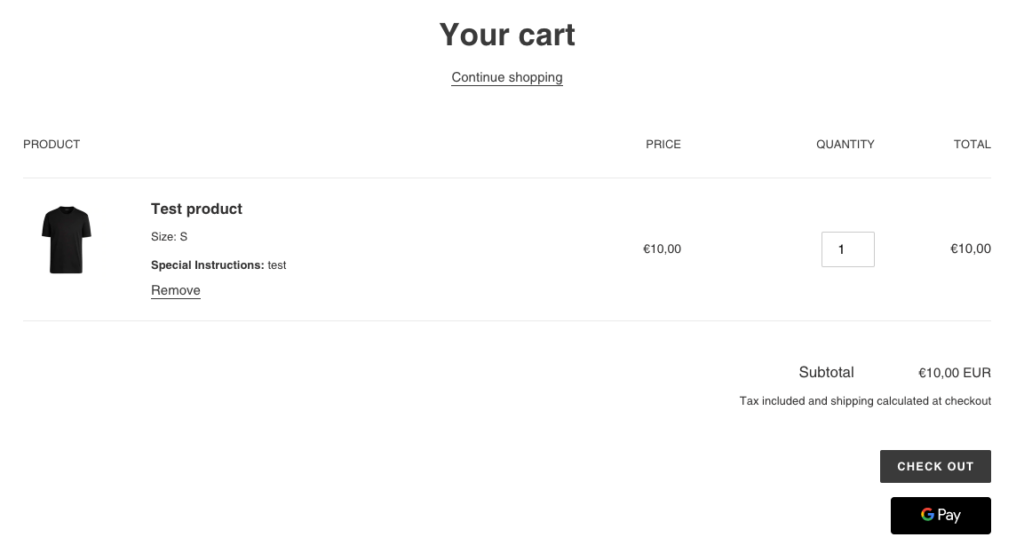
See the final results:
Note: If you want to dig deeper into what’s possible with Line Items Properties, you can read Shopify’s blog article here.
Thanks for reading, hope this article was helpful.
Read more about Ecommerce For Profit blog.